The iOS 10 Maps app displays a UIVisualEffectView with a drop shadow effect. The Maps app table view and map options view (vertical "toolbar") appear to hover above the map content.
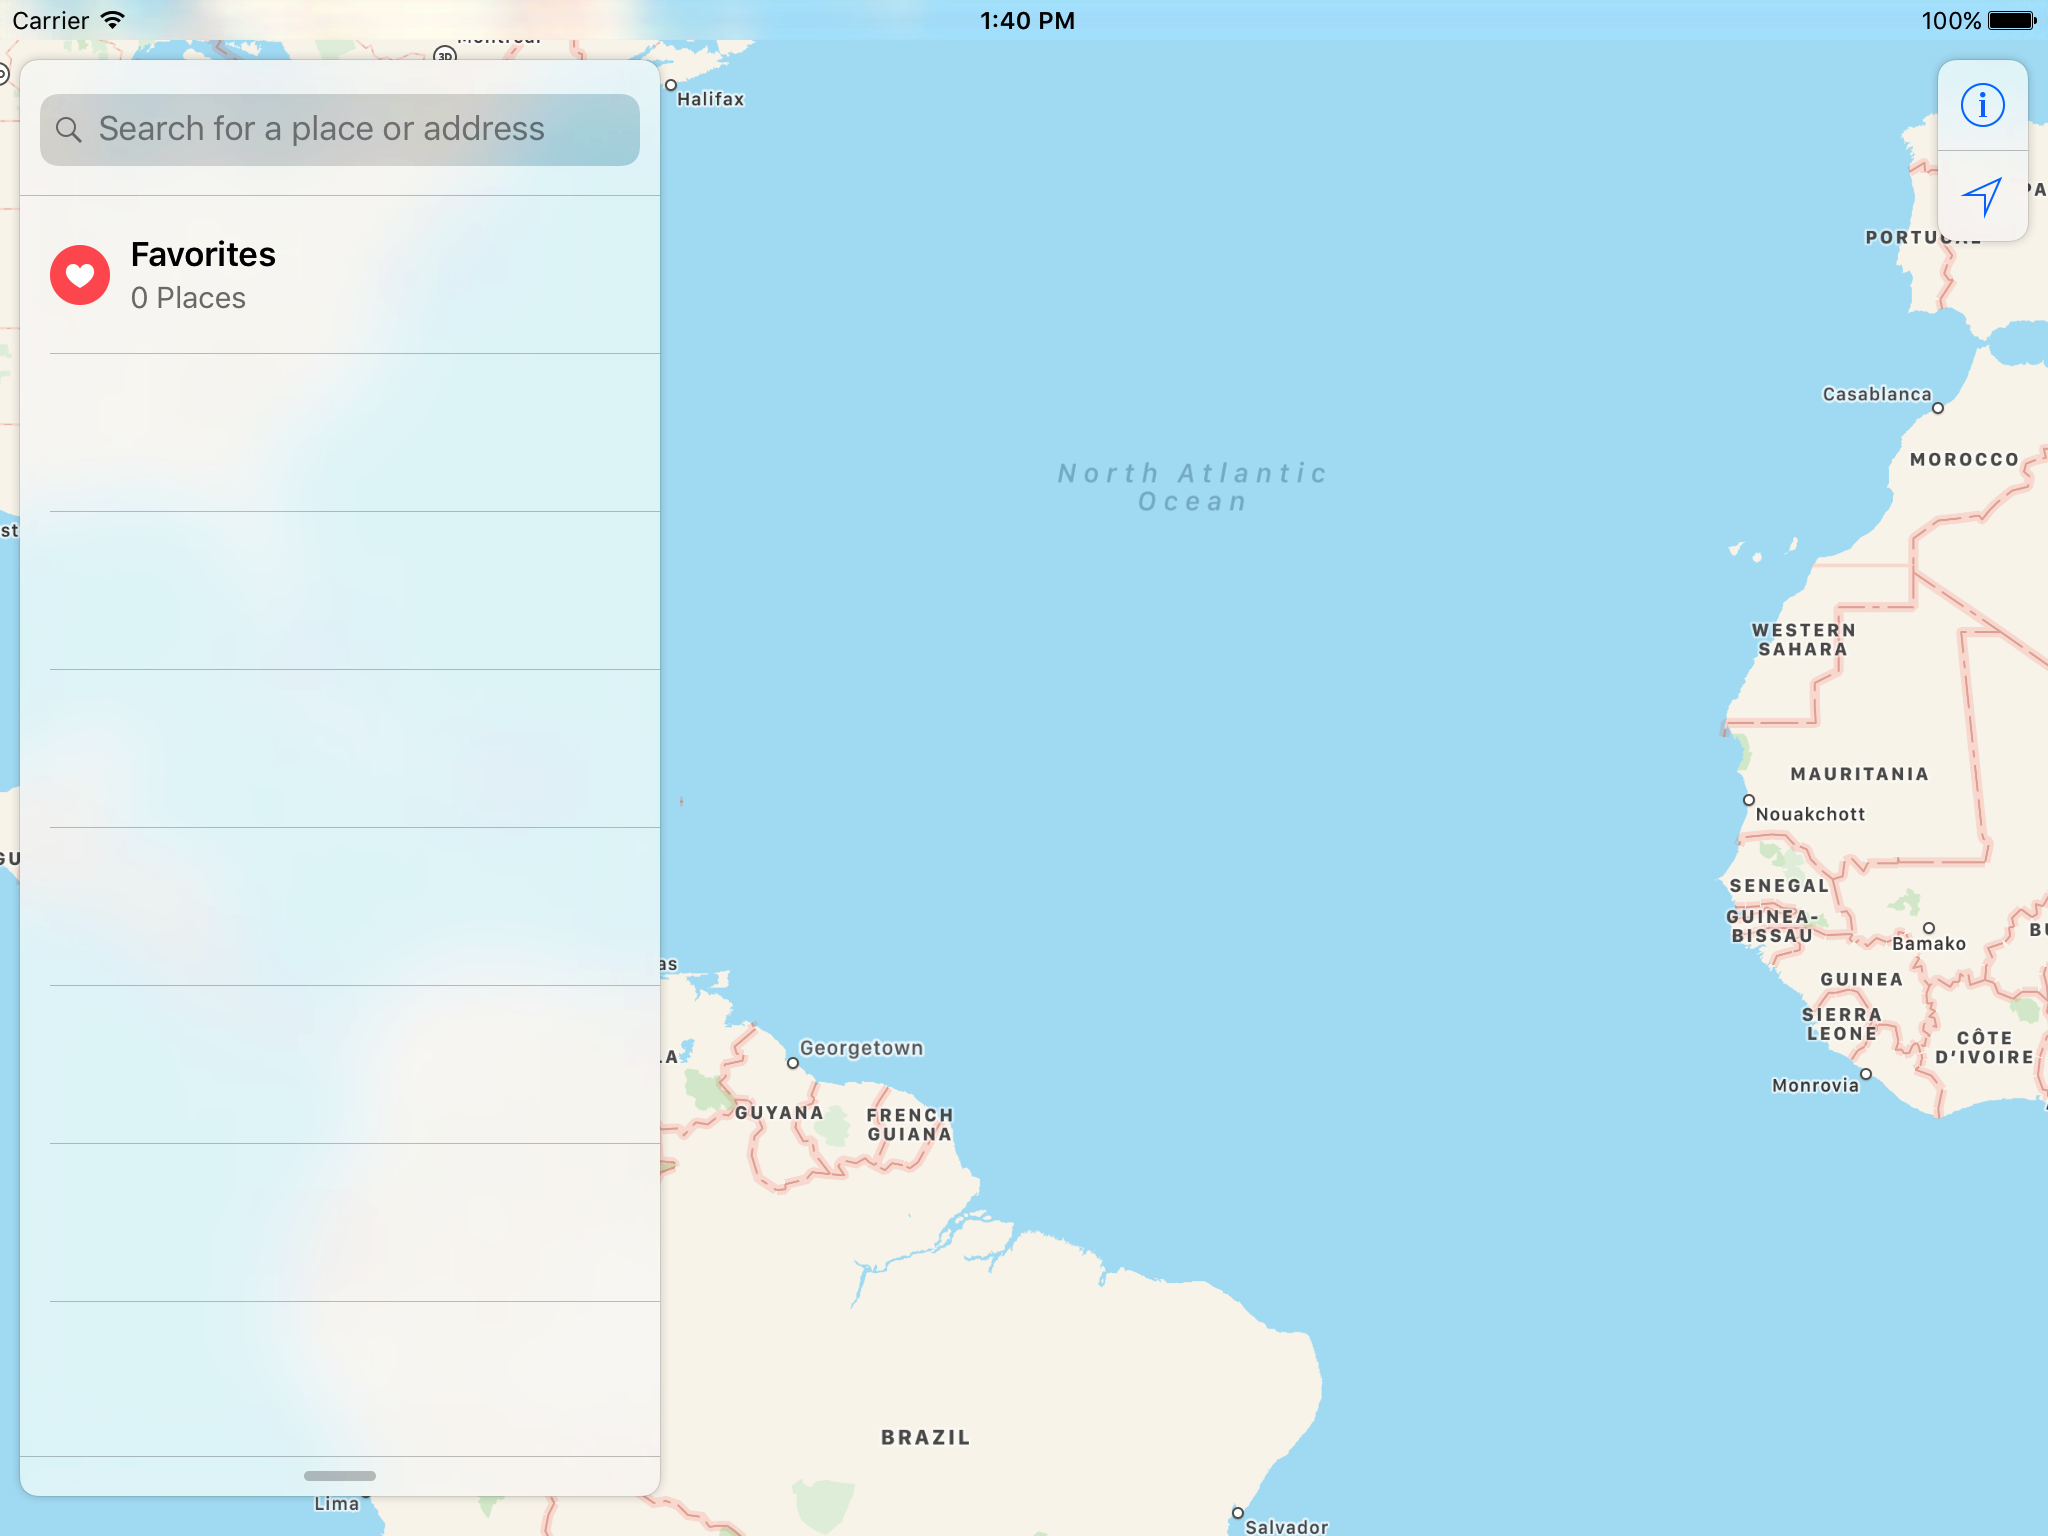
Let's implement the same visual style
A sample iOS project and Playground is available on GitHub.
Core ingredients
- one
MKMapView - one reusable "helper" view we will name
PassThroughView - one
UIVisualEffectViewwith aUIBlurEffect(.extraLightis nice) - one
UIImageViewwith a 9-partUIImagecontaining the shadow and a transparent center
A key to the solution is using a 9-part UIImage with a transparent "middle".
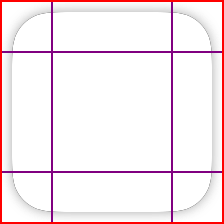
Dynamically creating 9-part shadow image
First let's create a simple representation of a shadow.
struct Shadow {
    let offset: CGSize
    let blur: CGFloat
    let color: UIColor
}
Next let's add a custom method to UIImage that generates a 9-part shadow image.
Note: there are several ways to generate this type of image. Feel free to adjust the implementation to suite your needs. For example you may want to add a thin inner border.
extension UIImage {

    static func resizableShadowImage(withSideLength sideLength: CGFloat, cornerRadius: CGFloat, shadow: Shadow) -> UIImage {
        // The image is a square, which makes it easier to set up the cap insets.
        //
        // Note: this implementation assumes an offset of CGSize(0, 0)

        let lengthAdjustment = sideLength + (shadow.blur * 2.0)
        let graphicContextSize = CGSize(width: lengthAdjustment, height: lengthAdjustment)

        // Note: the image is transparent
        UIGraphicsBeginImageContextWithOptions(graphicContextSize, false, UIScreen.main.scale)
        let context = UIGraphicsGetCurrentContext()!
        defer {
            UIGraphicsEndImageContext()
        }

        let roundedRect = CGRect(x: shadow.blur, y: shadow.blur, width: sideLength, height: sideLength)
        let shadowPath = UIBezierPath(roundedRect: roundedRect, cornerRadius: cornerRadius)
        let color = shadow.color.cgColor

        // Cut out the middle
        context.addRect(context.boundingBoxOfClipPath)
        context.addPath(shadowPath.cgPath)
        context.clip(using: .evenOdd)

        context.setStrokeColor(color)
        context.addPath(shadowPath.cgPath)
        context.setShadow(offset: shadow.offset, blur: shadow.blur, color: color)
        context.fillPath()

        let capInset = cornerRadius + shadow.blur
        let edgeInsets = UIEdgeInsets(top: capInset, left: capInset, bottom: capInset, right: capInset)
        let image = UIGraphicsGetImageFromCurrentImageContext()!

        return image.resizableImage(withCapInsets: edgeInsets, resizingMode: .tile)
    }
}
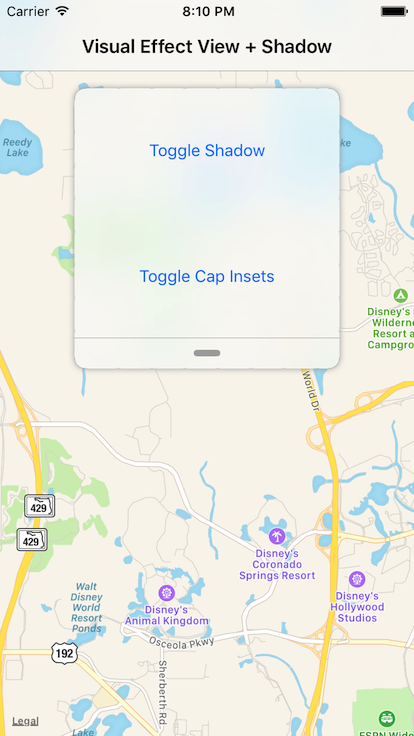
Building A Sample App
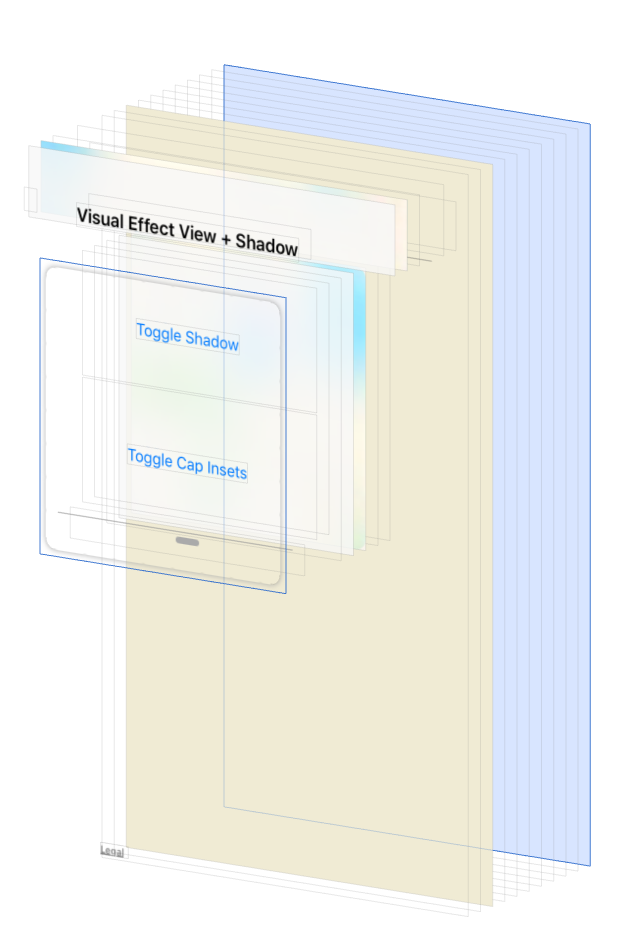
Sample app view hierarchy
+ map view (fills the entire screen)
  + parent view (e.g. `PassThroughView`)
    + visual effect view
      + content view
        + your views (with clear backgrounds)
    + image view with 9-part shadow image with "hole" cut in the middle
Creating A Reusable "PassThroughView"
Setting up some basic view properties
The Properties are used when laying out the views and generating the shadow image.
final class PassThroughView: UIView {

    fileprivate enum Properties {
        static let cornerRadius: CGFloat = 10.0
        static let shadow: Shadow = Shadow(offset: CGSize(), blur: 6.0, color: .lightGray)
    }

    ...
Exposing an API for adding subviews
Developers add subviews to the PassThroughView's contentView. The contentView is a simple proxy to the visual effect view's contentView.
     var contentView: UIView {
        return visualEffectView.contentView
    }

    ...
Setting up some basic view properties
The initializers call a private initializer named selfInit to set up the view hierarchy and apply the layout constraints.
     private lazy var visualEffectView = self.lazyVisualEffectView()
    private lazy var shadowView = self.lazyShadowView()

    convenience init() {
        self.init(frame: CGRect())
    }

    override init(frame: CGRect) {
        super.init(frame: frame)

        self.selfInit()
    }

    required init?(coder aDecoder: NSCoder) {
        super.init(coder: aDecoder)

        self.selfInit()
    }

    ...
Add the subviews (visual effect view and shadow image view)
The shadowView sits below the visualEffectView. This is because the generated shadow image is not pixel-perfect aligned with the visual effect view's rounded corners. I am sure there are some optimizations that can be made.
     private func selfInit() {
        backgroundColor = .clear

        addSubview(shadowView)
        addSubview(visualEffectView)

        ...
Apply the constraints
You'll notice the shadow view constraints include the blurRadius. The shadow view hugs or wraps the visual effect view.
         let blurRadius = Properties.shadow.blur
        NSLayoutConstraint.activate([
            visualEffectView.topAnchor.constraint(equalTo: topAnchor),
            visualEffectView.trailingAnchor.constraint(equalTo: trailingAnchor),
            visualEffectView.bottomAnchor.constraint(equalTo: bottomAnchor),
            visualEffectView.leadingAnchor.constraint(equalTo: leadingAnchor),

            shadowView.topAnchor.constraint(equalTo: topAnchor, constant: -blurRadius),
            shadowView.trailingAnchor.constraint(equalTo: trailingAnchor, constant: blurRadius),
            shadowView.bottomAnchor.constraint(equalTo: bottomAnchor, constant: blurRadius),
            shadowView.leadingAnchor.constraint(equalTo: leadingAnchor, constant: -blurRadius),
        ])
    }
}
Creating the visual effect view
extension PassThroughView {

    private func lazyVisualEffectView() -> UIVisualEffectView {
        let view = UIVisualEffectView(effect: UIBlurEffect(style: .extraLight))
        view.translatesAutoresizingMaskIntoConstraints = false
        view.layer.cornerRadius = Properties.cornerRadius
        view.layer.masksToBounds = true

        return view
    }


    ...
Setting up the image view with a 9-part image view
The Properties we declared above are used to create the shadow image.
     private func lazyShadowView() -> UIImageView {

        let image = resizeableShadowImage(
            withCornerRadius: Properties.cornerRadius,
            shadow: Properties.shadow,
            shouldDrawCapInsets: showCapInsetLines
        )

        let view = UIImageView(image: image)
        view.translatesAutoresizingMaskIntoConstraints = false

        return view
    }

    private func resizeableShadowImage(
        withCornerRadius cornerRadius: CGFloat,
        shadow: Shadow,
        shouldDrawCapInsets: Bool
    ) -> UIImage {

        let sideLength = cornerRadius * 5 // trial and error: a multiple of 5 seems to create a decent shadow image
        return UIImage.resizableShadowImage(
            withSideLength: sideLength,
            cornerRadius: cornerRadius,
            shadow: shadow,
            shouldDrawCapInsets: showCapInsetLines
        )
    }
}
Get the code
Be sure to check out the sample iOS project and Playground on GitHub.
Got a better way to generate the shadow image? Let me know via a pull request.
Also, take a look at my post named Visualize iOS 10 Maps App View Hierarchy In Xcode. It shows how to visualize any iOS simulator app's view hierarchy.